The Battle of nations enters its second hour with a blanket of light snow dropping visibility down to 500yds at best. The guns fall silent as men and horse grope forward in the white mist. Silhouettes in the distance indiscernible at first soon betray their origin as foe's clash in a fury of gunfire and swords.
On the Allied left flank the Prussians feverishly push forward to quickly form a solid wall of infantry and artillery as the Wurttemberger's take advantage of the respite given to them by the retreating Prussian cavalry brigade to advance rapidly. The Wurttemberg Fuzzjager btln covers the following heavy infantry by engaging the Prussian line as the casualties on both sides continue to mount.
On the Prussian right the action in the village intensifies as the Bavarian contingent is now fully engaged with the advancing Russians. Jager btlns have now secured the forward woods and have opened up a lively firefight against the light companies of a forward Bavarian Infantry regiment. Meanwhile a Prussian Jager btln supported by a Fusilier btln has overwhelmed the Bavarian light btln facing them forcing it to break and round through the fields to the rear. This has exposed a Bavarian foot battery which is now very vulnerable.
Towards the centre of the battlefield the Polish brigade has now activated its break-off orders after suffering from intense Russian artillery fire. The snow shower providing the Polish with some respite from the gunfire to withdraw slowly out of effective range. The Russians have also taken advantage of this development to bring up a cavalry division into the vicinity in the hope of crushing the retreating Polish. However, the distance is rapidly extending and the chance to pounce has clearly passed.
Towards the Allied right centre another Russian division is finding itself hotly engaged with a French Legere regiment that has taken position behind hedgerows catching the forward Russian Musketeer regiment in the open in formed line. These Russian btlns failed to initiate a charge on the enemy regiment and is now rapidly being cut to pieces from the incoming skirmisher fire while its own fire is highly ineffectual. However, a Cossack sontia is poised directly behind the faltering Russian forward line ready to charge the unsuspecting French lights. If successful this charge could save the predicament of the Russian infantry lines.
Towards the Allied right flank the forward Austrian Infantry brigade remains isolated defending itself from an entire French division. The French failed to take advantage of a faltering Hungarian Infantry column with an exposed flank. This shaken unit was at the mercy of the French who failed to act. This unit subsequently through the work of its integral officers and NCO's managed to re-order the btln and form line to face the right of their position. Its situation is still dire and it could yet still collapse if the French act quickly. Meanwhile the Austrian 3rd ranker's and Jagers continue to defend themselves against a Legere regiment facing it.
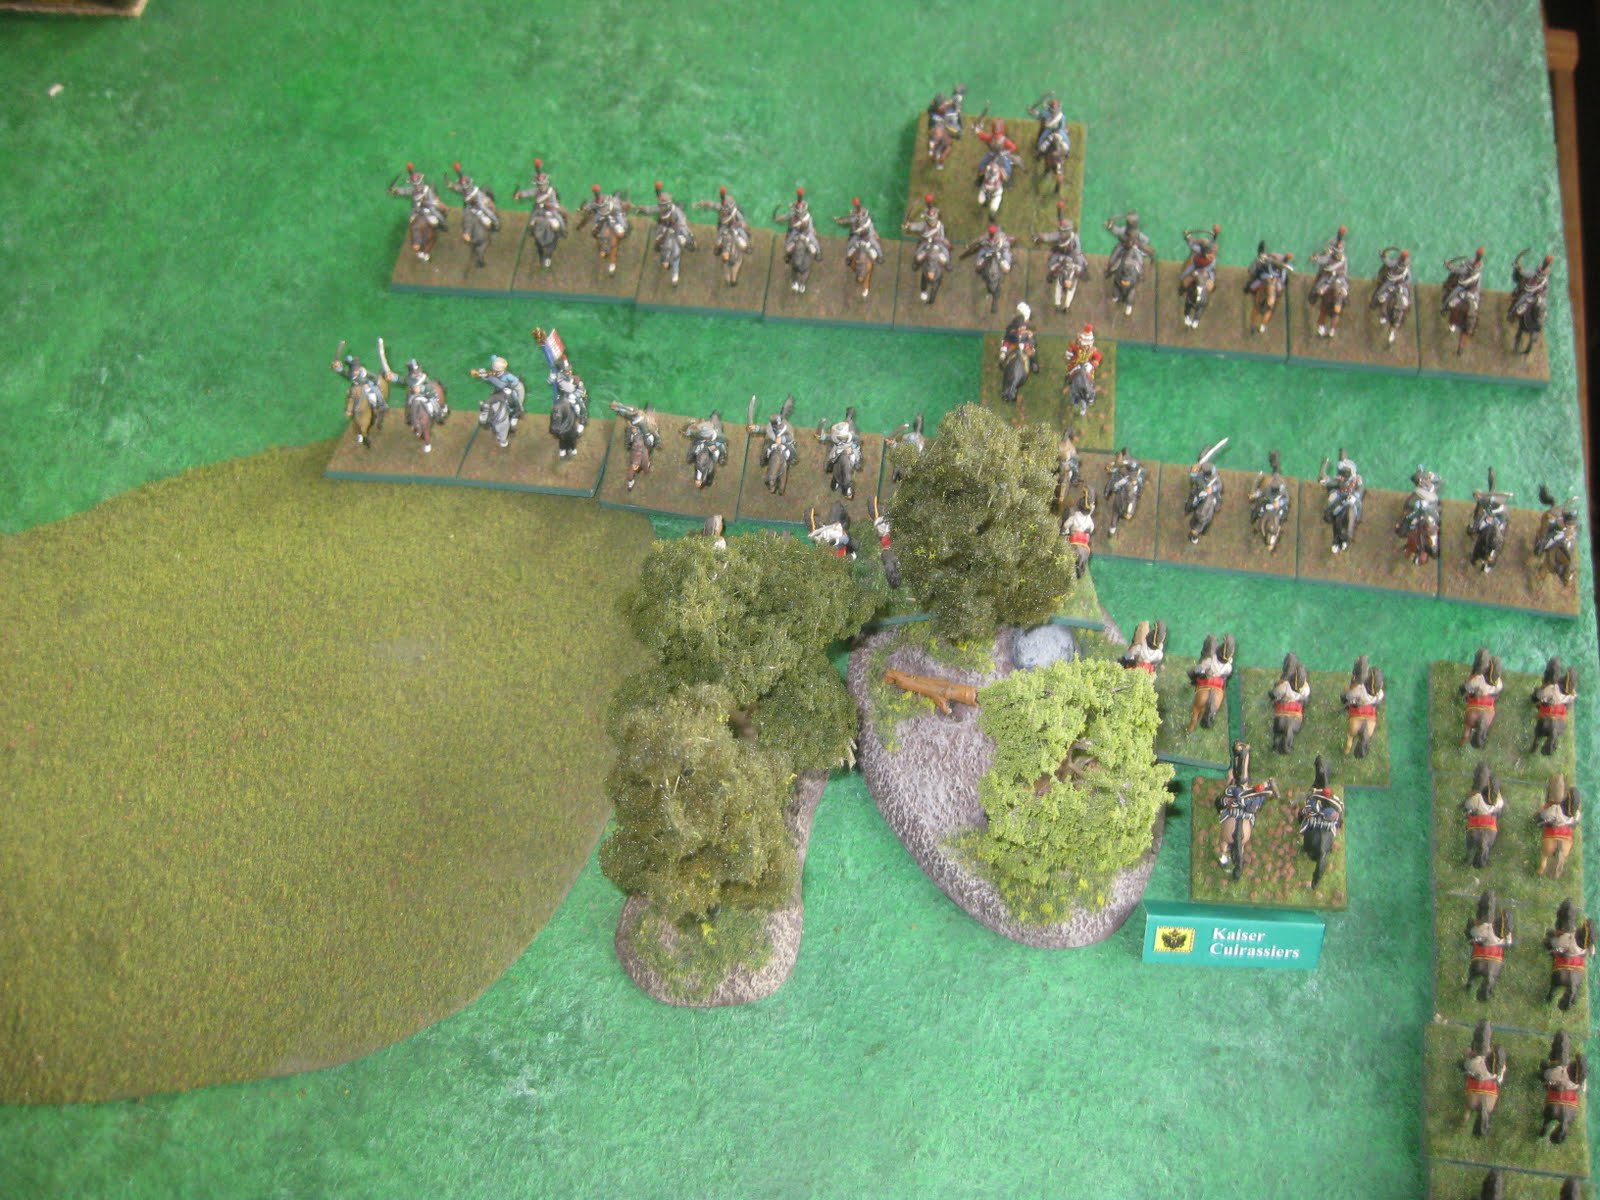
During this time the rear Austrian brigades finally activated their orders and are now advancing to support the beleaguered forward brigade on its right flank. In the process one btln of the 4th Regiment of Infantry charged a French skirmish screen forcing it to evade rapidly away while on the extreme Allied right flank the Austrian cuirassiers finally prevailed over their lighter French counterparts forcing them to rapidly retire. Taking advantage of the respite the Cuirassiers have reformed ready to re-engage if necessary.
On the Allied left flank the Prussians feverishly push forward to quickly form a solid wall of infantry and artillery as the Wurttemberger's take advantage of the respite given to them by the retreating Prussian cavalry brigade to advance rapidly. The Wurttemberg Fuzzjager btln covers the following heavy infantry by engaging the Prussian line as the casualties on both sides continue to mount.
On the Prussian right the action in the village intensifies as the Bavarian contingent is now fully engaged with the advancing Russians. Jager btlns have now secured the forward woods and have opened up a lively firefight against the light companies of a forward Bavarian Infantry regiment. Meanwhile a Prussian Jager btln supported by a Fusilier btln has overwhelmed the Bavarian light btln facing them forcing it to break and round through the fields to the rear. This has exposed a Bavarian foot battery which is now very vulnerable.
Towards the centre of the battlefield the Polish brigade has now activated its break-off orders after suffering from intense Russian artillery fire. The snow shower providing the Polish with some respite from the gunfire to withdraw slowly out of effective range. The Russians have also taken advantage of this development to bring up a cavalry division into the vicinity in the hope of crushing the retreating Polish. However, the distance is rapidly extending and the chance to pounce has clearly passed.
Towards the Allied right centre another Russian division is finding itself hotly engaged with a French Legere regiment that has taken position behind hedgerows catching the forward Russian Musketeer regiment in the open in formed line. These Russian btlns failed to initiate a charge on the enemy regiment and is now rapidly being cut to pieces from the incoming skirmisher fire while its own fire is highly ineffectual. However, a Cossack sontia is poised directly behind the faltering Russian forward line ready to charge the unsuspecting French lights. If successful this charge could save the predicament of the Russian infantry lines.
Towards the Allied right flank the forward Austrian Infantry brigade remains isolated defending itself from an entire French division. The French failed to take advantage of a faltering Hungarian Infantry column with an exposed flank. This shaken unit was at the mercy of the French who failed to act. This unit subsequently through the work of its integral officers and NCO's managed to re-order the btln and form line to face the right of their position. Its situation is still dire and it could yet still collapse if the French act quickly. Meanwhile the Austrian 3rd ranker's and Jagers continue to defend themselves against a Legere regiment facing it.
During this time the rear Austrian brigades finally activated their orders and are now advancing to support the beleaguered forward brigade on its right flank. In the process one btln of the 4th Regiment of Infantry charged a French skirmish screen forcing it to evade rapidly away while on the extreme Allied right flank the Austrian cuirassiers finally prevailed over their lighter French counterparts forcing them to rapidly retire. Taking advantage of the respite the Cuirassiers have reformed ready to re-engage if necessary.